When you need to sell your iPhone, or fix persistent problems, resetting it to the state it was when it came from the factory, can help. Here’s how to do it — and what you should do first.
If you’re about to give your iPhone to someone, or if you’re just having so many problems that you want to start over, reset the iPhone. It’s quick and easy to do a complete factory reset, turning your iPhone back to the state it was when you first got it.
Only, if it’s quick and easy to do, it’s not exactly fast to undo. Plus you can put back all of your apps, but if you haven’t backed up before resetting, you’ll have lost data.
Here’s what you need to do before you start, and then what you have to do to do a complete factory reset.

First, select that you want to erase the iPhone and start again
Prepare for a reset
You will be prompted to backup your iPhone during the reset process, but it will specifically be an iCloud backup. There’s no longer a giant difference between using iCloud and backing up to your Mac, but there is a difference.
Normally the key difference is that with a backup to your Mac, it’s possible to back up your apps. In this case, though, backing up to the Mac can make it quicker to set up the iPhone again.
How to do a factory reset on iPhone
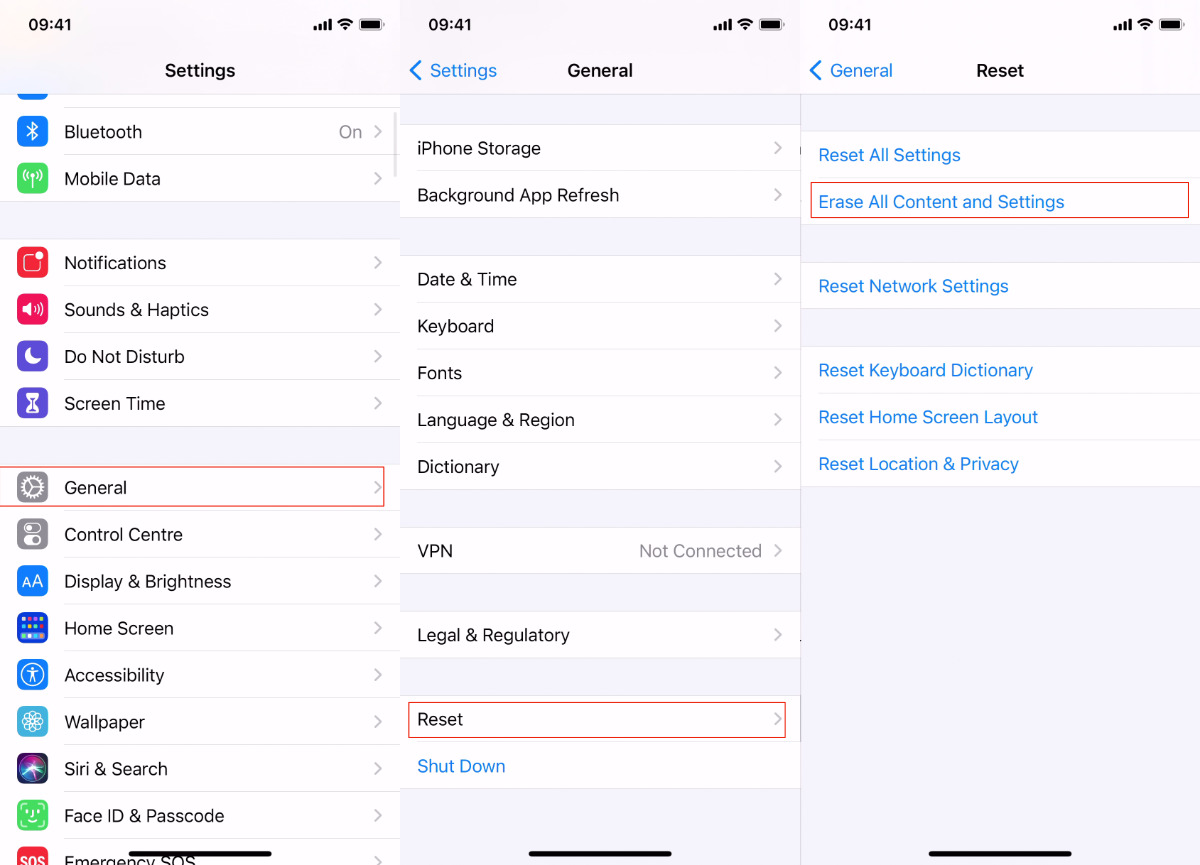
- Go to Settings, the tap General
- Scroll down to Reset
- Choose Erase All Content and Settings
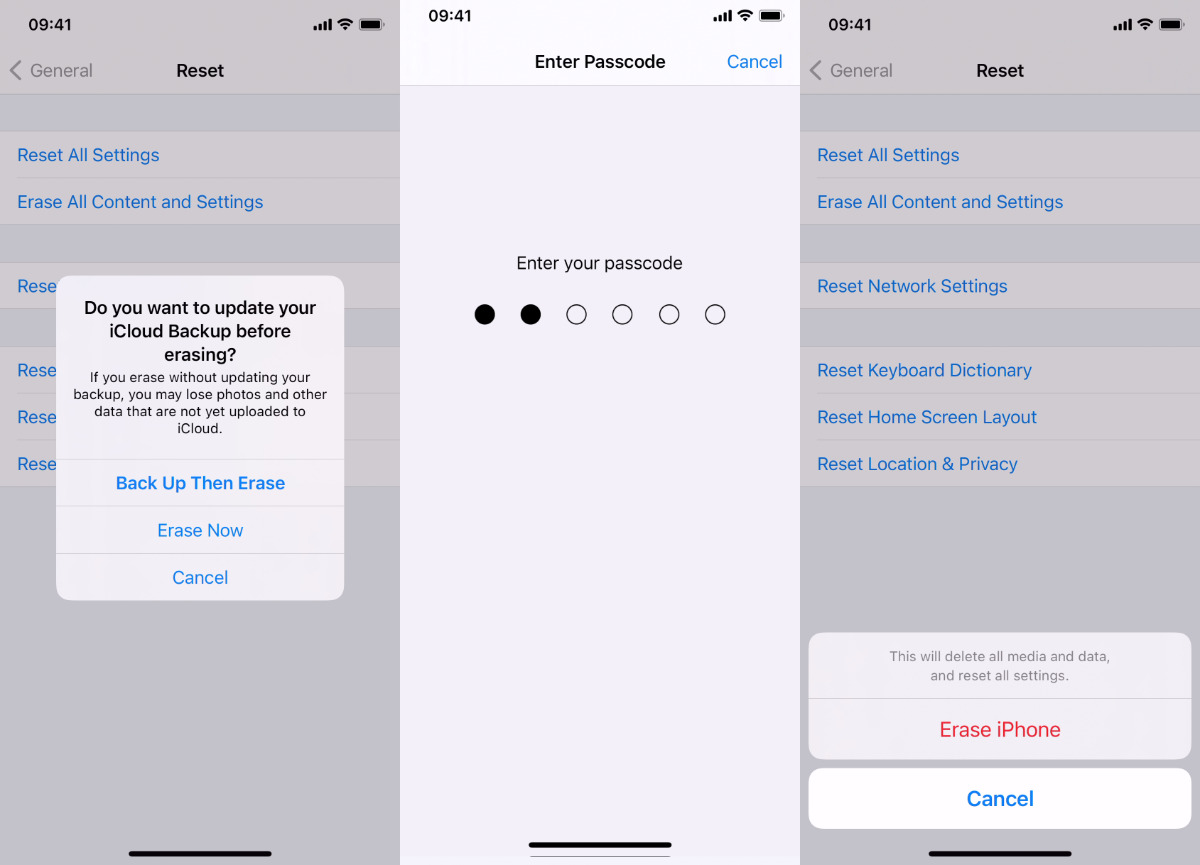
- Tap either Back Up Then Erase, or Erase Now
- Enter your passcode to confirm it’s you
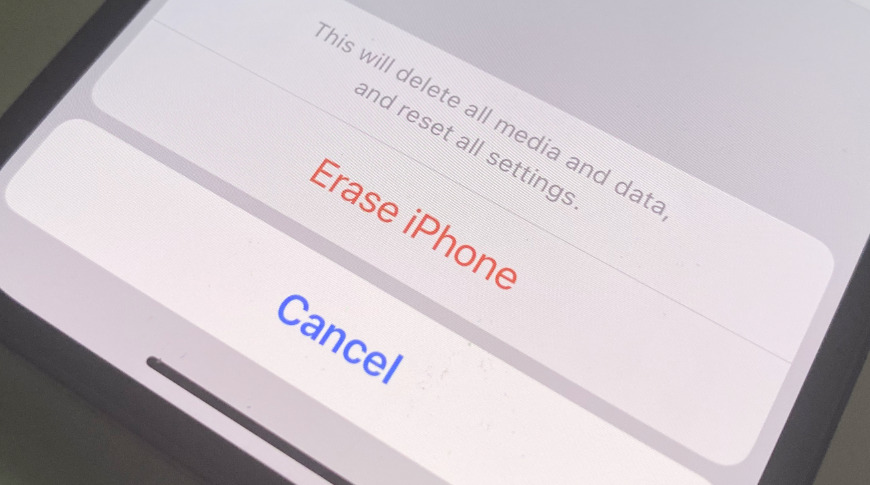
- Tap Erase iPhone
- Tap again to confirm
It’s a quick process in the sense that you don’t have to do much, but then the iPhone erases quickly, too. Hopefully you won’t need or want to do this often, but when you do, it’s probably easiest to reset this way, directly on the iPhone.
However, there is an alternative. You can use your Mac.

Next, confirm that you really want to do this — because you can’t undo it.
It’s basically the same process, except that the way Apple’s on-screen prompts are worded is confusing. To erase an iPhone via your Mac, you have to click on a button called Restore iPhone.
You haven’t erased it yet, you haven’t reset it to factory settings yet, but Apple describes this as restoring your iPhone. Ultimately that’s true, because either you or someone you’re selling the phone to will set it up again, but it could be clearer.
How to factory reset your iPhone from your Mac
- On the iPhone, got to Settings
- Tap on your name at the top of the screen that appears
- Choose Find My
- Tap on Find My, then tap to toggle Find My iPhone off
- Plug the iPhone into your Mac
- Open a Finder window and click on the iPhone’s name under Locations in the sidebar
- If prompted, confirm that you Trust this device
- After a moment, the iPhone’s details will be shown. Click on the General tab
- Click to select Back up all the data on your iPhone to this Mac
- Click on Back Up Now
- Wait for the back up to complete
- Click on Restore iPhone…
If the Restore button is greyed out, you haven’t signed out of Find My on your iPhone. As soon as you have, the button is available and clicking it means your Mac will completely erase your iPhone.
It will then offer you the choice of setting the iPhone up as a new device, or restoring it from a previous backup. This is why it’s important to have just done a backup as part of this process.
Seemingly the Mac will offer you any iPhone backup that it has, regardless of what Apple ID you’re signed in as. Consequently, in AppleInsider testing, we found it would sometimes offer solely a backup from a different user of the Mac.
There’s an argument that you just did a factory reset in order to get rid of some problem, and now you’re trying to restore the iPhone to the state it was in before. Remember that you can ignore the backups and instead go through setting up the device from new.
That includes manually signing in with your existing Apple ID, and schlepping through setting up accounts like your Mail and Apple Store ones.
So it’s not as convenient as clicking a restore button, but it still won’t take long before your iPhone is back working the way you want.
